Jekyll 설치
Jekyll. install and usage for Mac
Jekyll 환경설정 (Environment Setup)
Ruby 설치
맥에 기본적으로 설치된 Ruby 버젼을 확인하고 최신버젼으로 업데이트하자.
babyK@macbook ~ % ruby -v
ruby 3.1.1p18 (2022-02-18 revision 53f5fc4236) [x86_64-darwin21]
babyK@macbook ~ % gem -v
3.3.7
babyK@macbook ~ % brew install ruby
Bundler, Jekyll 설치
jekyll을 사용해 Github page에 업로드할 홈페이지를 만들어보자.
Ruby Gem들의 의존성을 관리할 수 있는 bundler를 설치한다.
babyK@macbook ~ % gem install bundler
babyK@macbook ~ % gem install jekyll bundle
babyK@macbook ~ % jekyll -v
GemNotFound에러 발생시 ‘bundle’ or ‘bundle install’ 입력.
bundle install 커맨드는 Gemfile 안에 리스트업 되어 있는 Gem의 의존성을 체크하고
최종 라이브러리 리스트인 Gemfile.lock 파일을 생성한다.
설치중 버젼과 관련한 문제발생시 단순하게 ‘bundle update’ 명령으로
Gem을 모두 업데이트 해보자.
Jekyll 폴더 생성
babyk@Ks-macbook gitRepo % jekyll new testPage
Running bundle install in /Users/babyk/workspace/gitRepo/testPage...
  Bundler: Fetching gem metadata from https://rubygems.org/..........
  Bundler: Resolving dependencies...
  Bundler: Using public_suffix 4.0.6
  Bundler: Using bundler 2.3.8
  Bundler: Using colorator 1.1.0
  Bundler: Using concurrent-ruby 1.1.9
  Bundler: Using eventmachine 1.2.7
  Bundler: Using http_parser.rb 0.8.0
  Bundler: Using ffi 1.15.5
  Bundler: Using forwardable-extended 2.6.0
  Bundler: Using rb-fsevent 0.11.1
  Bundler: Using liquid 4.0.3
  ...
  Bundler: Bundle complete! 7 Gemfile dependencies, 31 gems now installed.
  Bundler: Use `bundle info [gemname]` to see where a bundled gem is installed.
New jekyll site installed in /Users/babyk/workspace/gitRepo/testPage.
babyk@Ks-macbook gitRepo %
서버 start
처음 서버 실행시에는 ‘bundle exec jekeyll serve’ 를 입력하여 실행할 수 있고 이후부터는 ‘jekyll serve’만 입력해도 실행된다.
babyk@Ks-macbook testPage % bundle exec jekyll serve
Configuration file: /Users/babyk/workspace/gitRepo/testPage/_config.yml
            Source: /Users/babyk/workspace/gitRepo/testPage
       Destination: /Users/babyk/workspace/gitRepo/testPage/_site
 Incremental build: disabled. Enable with --incremental
      Generating...
       Jekyll Feed: Generating feed for posts
                    done in 0.343 seconds.
 Auto-regeneration: enabled for '/Users/babyk/workspace/gitRepo/testPage'
                    ------------------------------------------------
      Jekyll 4.2.2   Please append `--trace` to the `serve` command
                     for any additional information or backtrace.
                    ------------------------------------------------
/usr/local/lib/ruby/gems/3.1.0/gems/jekyll-4.2.2/lib/jekyll/commands/serve/servlet.rb:3:in `require': cannot load such file -- webrick (LoadError)
	from /usr/local/lib/ruby/gems/3.1.0/gems/jekyll-4.2.2/lib/jekyll/commands/serve/servlet.rb:3:in `<top (required)>'

babyk@Ks-macbook testPage %
*cannot load such file -- webrick (LoadError)
Gemfile 안에 webrick gem 이 없어서 발생하는 문제로 ‘bundle add webrick’ 입력.
babyk@Ks-macbook testPage % bundle add webrick
Fetching gem metadata from https://rubygems.org/.........
Resolving dependencies...
Fetching gem metadata from https://rubygems.org/.........
Resolving dependencies...
Using public_suffix 4.0.6
Using bundler 2.3.8
Using colorator 1.1.0
Using concurrent-ruby 1.1.9
Using eventmachine 1.2.7
Using http_parser.rb 0.8.0
Using ffi 1.15.5
Using forwardable-extended 2.6.0
Using rb-fsevent 0.11.1
Using rexml 3.2.5
Using liquid 4.0.3
Using mercenary 0.4.0
Using rouge 3.28.0
Using webrick 1.7.0
...
babyk@Ks-macbook testPage %
Gemfile 을 열어보면 아래와 같이 마지막 줄에 webrick gem이 추가된 것을 확인할 수 있다.
# frozen_string_literal: true

source "https://rubygems.org"

git_source(:github) { |repo_name| "https://github.com/#{repo_name}" }
gem "jekyll"
gem 'jekyll-feed'
gem 'jemoji'
gem 'webrick'

# gem "rails"
다시 서버 스타트.
babyk@Ks-macbook testPage % jekyll serve
Configuration file: /Users/babyk/workspace/gitRepo/testPage/_config.yml
            Source: /Users/babyk/workspace/gitRepo/testPage
       Destination: /Users/babyk/workspace/gitRepo/testPage/_site
 Incremental build: disabled. Enable with --incremental
      Generating...
       Jekyll Feed: Generating feed for posts
                    done in 0.33 seconds.
 Auto-regeneration: enabled for '/Users/babyk/workspace/gitRepo/testPage'
    Server address: http://127.0.0.1:4000/
  Server running... press ctrl-c to stop.
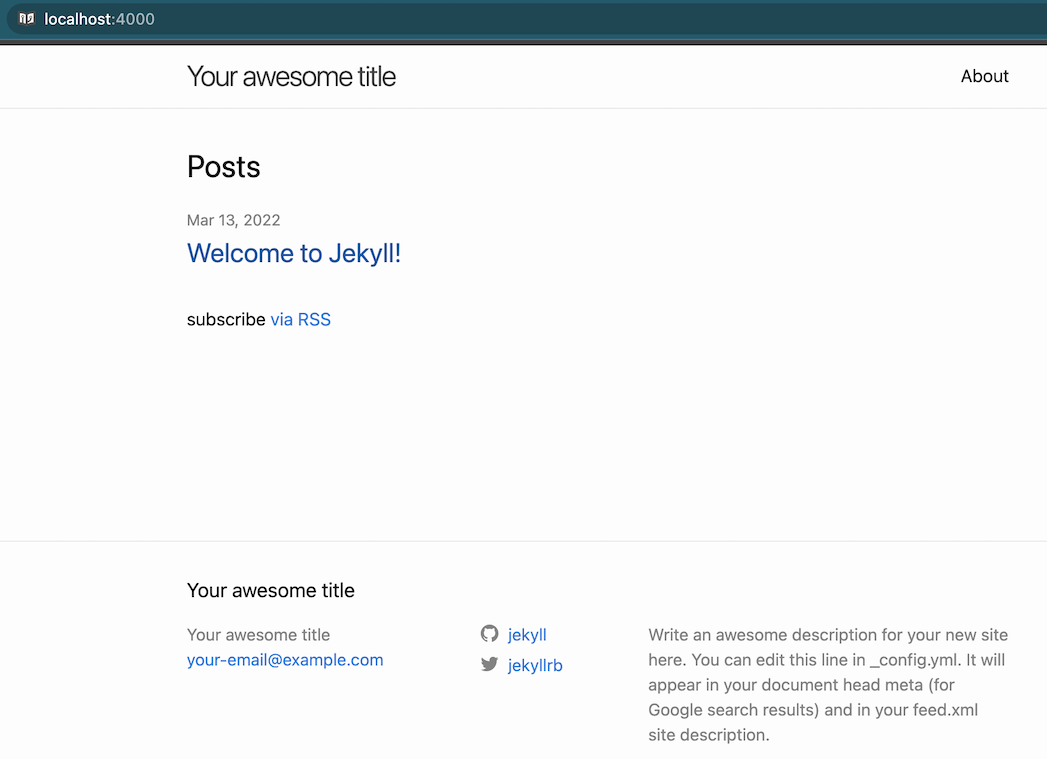
웹페이지 확인
디폴트 주소 : http://localhost:4000
포트변경
babyk@Ks-macbook testPage % jekyll serve --port 0000
실행중인 제킬 서버를 CTRL + C 로 종료하지 않고 다시 실행하면 포트가 이미 사용중이라며 오류가 발생할 수 있다.
이때는 포트번호를 변경하거나 직접 실행중인 프로세스를 종료해야 한다.

GithubPage에 올려 즉시 사용할 수 있는 홈페이지가 만들어졌다.